
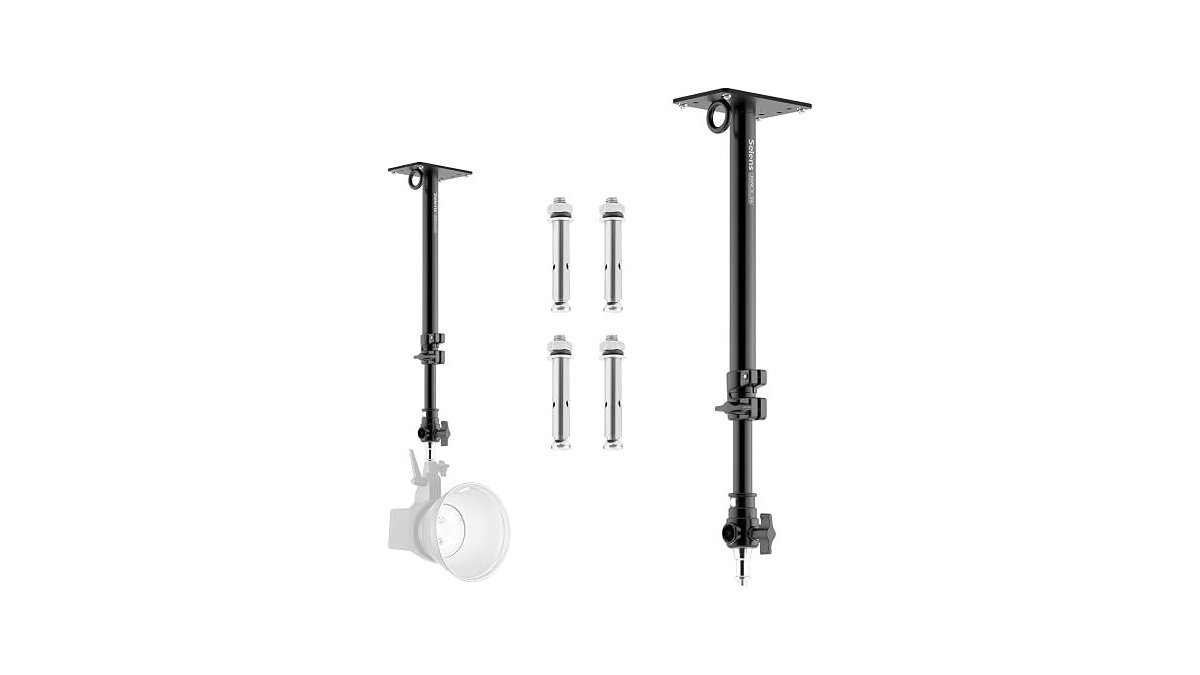
Choosing a ceiling mount depends on the weight of your gear, the surface you’re mounting to, and how much reach you need. These picks range from heavy-duty booms for studio lights to compact brackets for home security cameras. The main differences lie in their material strength, adjustment range, and mounting compatibility.
Best overall: Selens Boom Arm Mount, which offers a sturdy metal build and adjustable reach, making it a flexible choice for both studio lights and heavy cameras. Best for stability: Prisual Professional Ceiling Mount, featuring a cold-rolled steel unibody design that prioritizes vibration reduction and long-term durability for professional PTZ camera setups. Best for security: VideoSecu Adjustable Ceiling Mount, as it provides a specific telescopic pole design and 360-degree swivel perfect for mounting dome-style surveillance cameras in residential or office environments.
This guide is for anyone looking to secure video equipment overhead.
How We Picked
We compared 16 different ceiling mount listings to find the most reliable options. Every pick had to clearly state its construction material, load capacity, and adjustment range. We excluded any product that lacked clear installation details or provided insufficient information about its compatibility with standard camera hardware.
1. Selens Boom Arm Mount

Best for: Studio photographers needing flexible overhead lighting or camera placement.
This boom arm is built from metal and intended for heavy-duty work in studio settings. Its adjustable height extends up to 22 inches, allowing you to position equipment exactly where it’s needed without taking up floor space. It includes 3/8 and 1/4 inch adapter screws, which helps when switching between different cameras or lighting gear.
You must verify your mounting surface before installation. This arm requires a solid wall or ceiling to support the weight of your equipment. If your wall is made of thin cement or plaster, the provided expansion screws won’t hold securely. In these cases, look for a solid structural beam instead.
If you’re mounting to a ceiling, confirm the material is thick enough to handle the torque of an extended arm. Installing this into a hollow or crumbling surface risks both your gear and your safety. When you have a solid surface, the mount provides a stable, permanent base for softboxes, strobes, or DSLR cameras.
Pros
- Sturdy, corrosion-resistant metal construction.
- Adjustable height up to 22 inches.
- Includes versatile 3/8 and 1/4 adapter screws.
Cons
- Not for thin cement or plaster.
2. VideoSecu 24-40 Inch Adjustable Tilt Swivel Bracket Long Drop Ceiling

Best for: Home security systems using dome-style cameras.
This bracket is designed specifically for security camera housings. It features an adjustable pole length from 24 to 40 inches, which is helpful if you need to drop your camera down from a high ceiling. The internal cable management system keeps wires hidden inside the extension pole, leading to a cleaner look.
If your ceiling is lower than 24 inches, this mount won’t fit your space. You should verify your camera weight before installation. While the aluminum alloy construction is durable, exceeding the 8-pound limit causes the mount to sag or fail.
The unit keeps the weight low while maintaining that 8-pound load capacity. You can tilt the camera 90 degrees and swivel it 360 degrees, providing control over your viewing angle. This mount isn’t intended for heavy studio cameras or large lighting gear. Use this for standard surveillance setups where weight and aesthetics are the primary concerns.
Pros
- Adjustable length from 24 to 40 inches.
- Integrated cable management for clean installs.
- Full 360-degree swivel and 90-degree tilt.
Cons
- Limited to 8 pounds load capacity.
- Not suitable for ceilings lower than 24 inches.
3. Prisual Professional Ceiling Mount

Best for: Professional PTZ camera installations in conference rooms, studios, or houses of worship.
This mount uses 1.2mm cold-rolled steel with a unibody construction that has no welding points. It’s designed to be very slim at 12.4mm thick, which keeps your setup low-profile in a professional environment.
Installation is straightforward with the included kit, designed to support 90% of camera mounting holes in under 5 minutes. The steel surface is treated with an anti-fingerprint coating and has passed a 72-hour salt spray test for durability.
If you’re mounting a standard PTZ system, use the sliding lock holes system to ensure a secure, fatigue-tested fit. However, if your device isn’t a PTZ camera, this bracket will likely fail to align. It’s engineered specifically for φ164.3mm systems and isn’t the right choice for general-purpose action or DSLR cameras.
Pros
- Strong 1.2mm cold-rolled steel construction.
- Slim 12.4mm profile for a clean look.
- Silicone pads help stabilize camera wobble.
Cons
- Specifically engineered for PTZ camera models.
4. Aluminum 1/4-20 Mount

Best for: Small cameras or monitors needing a compact footprint.
This mount uses a drill plate base that follows industry-standard AMPS patterns, making it easy to install on various flat surfaces like ceilings, walls, or car dashboards. It’s made from aluminum alloy and is built to hold devices weighing under 3 pounds. The dual-axis rotation allows you to fine-tune your camera angle after the base is secured.
Because it uses a standard 1/4-20 screw, it works with a wide range of compact cameras and monitors. If you’re mounting this in a vehicle or a delicate area, you should consult a professional to ensure the drilling doesn’t damage hidden parts. This mount is quite small and won’t support heavy or bulky professional equipment.
If your device exceeds the 3-pound limit, the aluminum construction won’t prevent mechanical failure or slippage. Use this mount only for lightweight gear like action cameras or small monitors. If you need to mount equipment on a vehicle dashboard, verify the depth of the mounting surface first. Drilling blindly into a dash often leads to damage to hidden wiring or internal sensors.
Pros
- Durable aluminum alloy construction.
- Standard AMPS hole pattern for mounting.
- Dual 360-degree rotation for positioning.
Cons
- Max load under 3 pounds.
5. V-FiabilidadI-Shaped Telescopic Security Camera Mount Bracket

Best for: Outdoor or indoor dome security camera projects.
This telescopic bracket works for both wall and ceiling mounting, offering a length range between 11.8 and 23.6 inches. It’s made from solid aluminum alloy with a weatherproof treatment, which helps protect the camera wires from rain, snow, and UV rays. The internal hollow structure allows you to hide all your cables inside the bracket itself.
The structural design is meant to prevent shaking caused by wind or vibration, ensuring a stable image. It’s compatible with many major dome camera brands, making it a versatile choice for surveillance upgrades. It’s specifically shaped for dome cameras and may require additional adapters if you’re using a standard DSLR or light fixture.
The all-aluminum construction provides higher hardness and durability for outdoor surveillance projects. If your camera housing lacks a side-entry port, use the hollow I-shaped center to feed wires directly through the mount. This hides the cables from UV degradation and prevents intruders from cutting the feed.
Pros
- Weatherproof treatment for outdoor use.
- Adjustable 11.8 to 23.6 inch length.
- Concealed cable routing inside the bracket.
Cons
- Designed primarily for dome cameras.
6. CAMVATE 1/4″-20 Mini Ball Head with Ceiling Mount

Best for: Small cameras that need a simple, adjustable base.
This is a very compact option consisting of a mini ball head and a small mounting base. It’s machined from aluminum alloy and allows for 360-degree rotation and 90-degree tilt. It connects to devices using the industry-standard tripod thread, making it compatible with most small cameras and monitors.
The base is small, attaching with two screws, which makes it easy to fit into tight corners. Because of its tiny size, it isn’t meant for heavy equipment or long extension distances. If you just need a small, adjustable pivot for a light camera, this is a straightforward solution.
Pros
- Compact aluminum alloy design.
- 360-degree rotation and 90-degree tilt.
- Simple two-hole mounting base.
Cons
- Very limited reach and size.
7. Camera Ceiling Wall Mount Light Stand 14.1-21.6inches/36-55 cm with 1/4

Best for: Adjustable overhead mounting in photography studios.
This boom arm adjusts from 14.1 to 21.6 inches and is made from metal to provide a strong, corrosion-resistant support. It includes common thread adapters, allowing you to attach a variety of lights, reflectors, or cameras. The arm can be mounted vertically or horizontally, giving you flexibility in how you arrange your studio space.
Four expansion screws are included to ensure a secure fix to your ceiling or wall. It’s designed to be lightweight and portable, making it easy to store when not in use. The listing doesn’t mention drywall installation requirements. Installing directly into hollow plaster will likely lead to structural failure.
Always test the stability of the mount before attaching your equipment. If the arm feels loose or wobbles when fully extended, check that the expansion screws are tightened flush against the surface. This mount is a permanent solution for clearing floor space, so choose your placement carefully to avoid needing to relocate it later.
Pros
- Adjustable length from 14.1 to 21.6 inches.
- Strong, corrosion-resistant metal material.
- Vertical or horizontal mounting options.
Cons
- Requires solid mounting surface.
How to Choose in Sixty Seconds
Which mount is best for heavy cameras?
Look for mounts constructed from solid metal or cold-rolled steel, such as the Selens Boom Arm or the Prisual Professional Ceiling Mount. These prioritize structural integrity, with the Prisual model featuring a 1.2mm unibody design that offers 40% higher torsional strength. Always verify the manufacturer’s weight capacity against your specific camera and lens combination. For example, the VideoSecu mount supports up to 8 lbs, while the aluminum tripod-threaded mount is rated for devices under 3 lbs. If you exceed these limits, you risk structural failure. Heavy equipment places significant stress on the mounting surface; avoid installing these on thin cement or plaster, as they require solid wood or masonry to prevent the expansion screws from pulling out.
Does the mount type matter for my camera?
Yes, the connection method is vital. Most consumer cameras use a standard tripod thread, making the aluminum tripod-threaded mount or the CAMVATE mini ball head ideal for flexible positioning. However, PTZ cameras often require specific, rigid bracket patterns like those found on the Prisual system, which uses a sliding lock holes system. If you’re installing a dome security camera, choose a telescopic bracket like the V-Fiabilidad. These include hollow, I-shaped channels for concealed cable routing, which protects wires from UV rays and weather damage. Match the mount’s attachment style to your camera’s specific mounting holes to avoid the instability of extra adapters.
What should I check before installing?
Check your mounting surface composition before buying. Most heavy-duty mounts require solid wood studs or concrete; thin cement ceilings and plaster walls are often too weak for the provided expansion screws. If you’re mounting on a ceiling, ensure the bracket is fastened with all included hardware. If you’re unsure of your ceiling’s load-bearing capacity, consult a professional. Finally, prioritize mounts with integrated cable management, such as the VideoSecu or V-Fiabilidad models. Hiding wires through the pole during initial setup is significantly easier than retrofitting cable covers later.
Related guides
- Best Video Camera 1080P 120Fps
- Best Adhesives for Car Phone Mounts
- Best Travel Bag With Camera Compartment
Frequently Asked Questions
What kind of ceiling surface is required for these mounts?
Most heavy-duty mounts require a solid surface like concrete or wooden beams to ensure stability. The Selens and Universal mounts are not suitable for thin cement or plaster walls. If using drywall, you must locate a structural joist or use a mounting plate to distribute weight.
Do these mounts require regular maintenance?
Maintenance is minimal, but you should check the screws and joints periodically. For mounts exposed to outdoor elements, like the V-Fiabilidad Telescopic Bracket, ensure the weatherproof coating remains intact to prevent corrosion. Periodically check that all locking knobs and screws are tight to ensure the mount remains secure. If you notice any rust or loose parts, tighten them immediately to keep your equipment secure and stable.
Is the simplest mount on the list enough for my needs?
The CAMVATE Mini Ceiling Mount is sufficient for lightweight cameras that do not require extra reach. These small ball heads are ideal for fixed angles in tight spaces. If you need to position your camera away from the ceiling or require specific cable routing, choose a more complex bracket.
What happens if the mount doesn’t fit my camera?
Most mounts featured here use the industry-standard tripod screw, which fits the vast majority of consumer cameras and monitors. If your device has a different mounting requirement, you may need an adapter. The Selens Boom Arm Mount and Universal Ceiling Wall Mount include common thread adapters to increase compatibility.


